Showing posts with label hiking. Show all posts

Sunday, March 2, 2014

Wilderness Areas: Let's Get WILD!

Local Treks: Sapling

Wouldn't you like to get away? Away from the streets teeming with exhaust spewing mechanical monsters, the constant ringing of cell phones, crowded restaurants, the dinging of emails in your inbox, the clamor of people as they march to and fro... Don't you deserve a break? A chance to leave technology and other people behind, a chance to take in a bit of nature's splendor in solitude?

Heck yea you do, and it's easier than you think, you just need to get out and experience your local wilderness areas!

Why (or why not) The Wilderness?
Local Treks: Lower Rock Creek formations
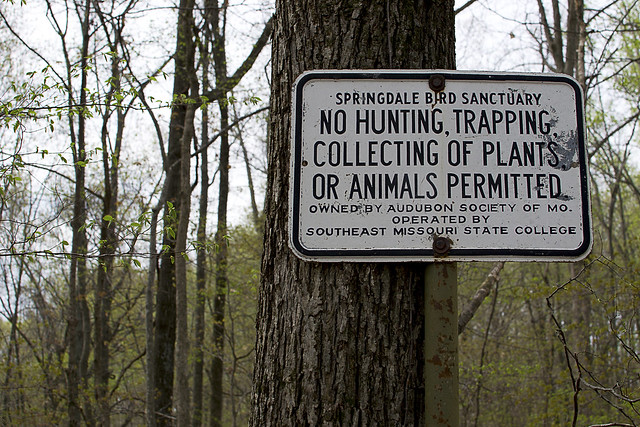
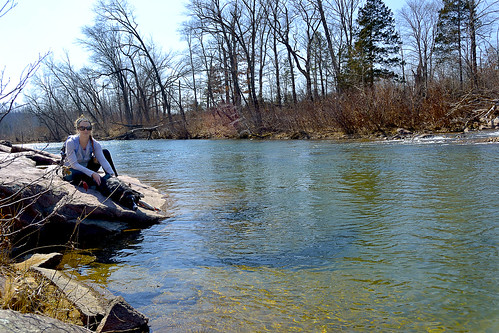
Some of you may be asking, "But why go to a Wilderness Area and not a regular State or Federal Park or recreation area?" I enjoy the Wilderness Areas because they are generally more remote, more secluded and less traveled than other conservation areas or general locations within our Federal or State Parks. Many times when I've been hiking or visiting these Wilderness Areas in Missouri I won't see another human being, I don't hear a hum of an engine (in fact, it is generally illegal to operate a motorized or mechanical vehicle inside a Wilderness Area), just the sweet songs and melodies of nature. Remember these areas are set aside to maintain and preserve the "wildness" of the landscape and wildlife, you are just a visitor.

Now, if you like having the thought that there are others out there and enjoy seeing people from time to time on your hike or backpacking trip, you may want to reconsider visiting the Wilderness Areas. I will be very honest when I say that I have not yet bumped into another person on a trail within the areas I have explored. If not seeing other people on your adventures sets your Spidey-Senses to tingling, you may be better served in one of the excellent conservation or recreation areas available.

Also, be sure to see if the outdoor activity you are looking to do is even available in the Wilderness Area you are looking to visit. In 1986, the Wilderness Act was reinterpreted to ban bicycles from these areas, so that means no mountain biking. Some areas restrict camping areas as well.

Where Can I Find Wilderness Areas?
Local Treks: A wooded trail.
A great source for finding a Wilderness Area near you is to visit Wilderness.Net at http://www.wilderness.net/. This site features a great collection of information on Wilderness Areas near you, features maps and is searchable by state, name, and more.

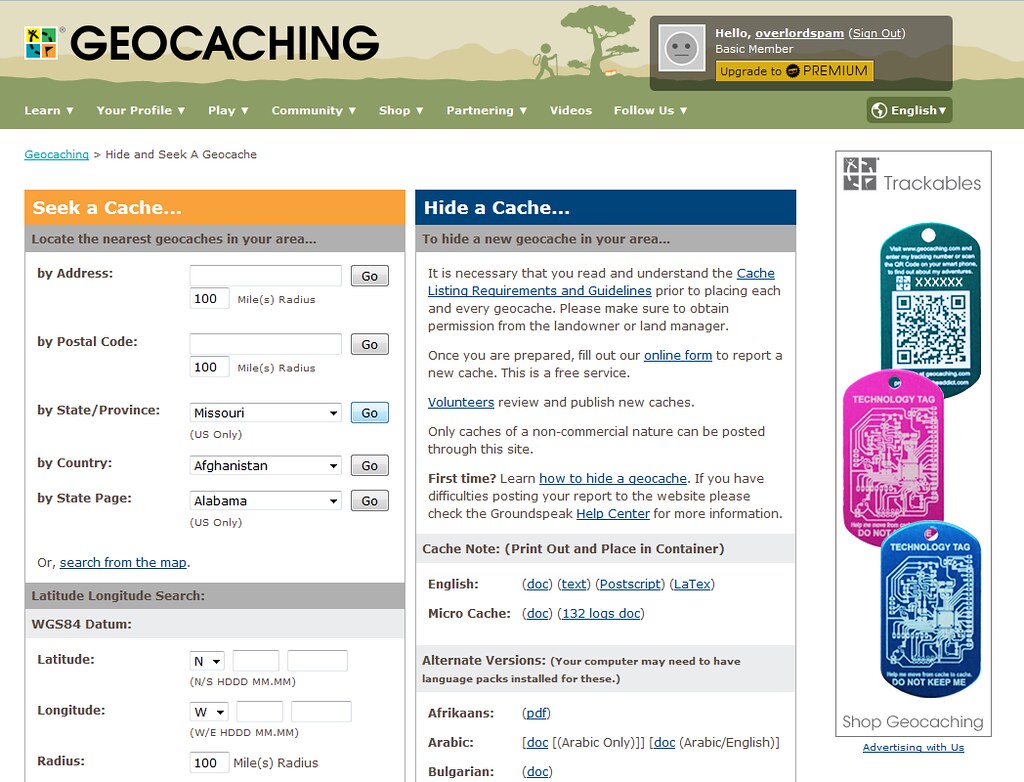
For those of you in Missouri, here are the Wilds near you!
I am looking forward to writing up some entries soon on
the Rockpile Mountain Wilderness and the Irish Wilderness! So stay tuned.

I certainly don't want to forget my neighbors across the river either. For my Illinoisan hiking pals here's a list of your wilds!
Links to Wilderness.net entries and some of my blog entries listed below.

Wilderness Manners.
Local Treks: Shedding Snake
It may sound odd or maybe even like a bit of an oxymoron, but there are certainly a set of Wilderness Manners that you need to observe when enjoying the acres and acres of designated Wilderness. Always keep in mind that these areas were set aside to preserve nature in as close to an "untouched" state as possible. Here are a few of them:
  • ALWAYS LET SOMEONE KNOW IF YOU ARE GOING TO BE IN THE WILDERNESS. GIVE THEM A TIME FOR YOUR RETURN. TELL THEM YOUR APPROXIMATE SCHEDULE, ROUTE, AND INTENDED CAMPING LOCATIONS.
  • Practice "Leave No Trace". Be sure to tread lightly so that nature may repair and endure for others to enjoy. If you pack it in, pack it out.
  • Pick up your trash. Pick up any other trash you may find as well and pack out with you whenever possible.
  • Always dispose of human waste at a minimum of 100 feet way from your campsite and at least 200 feet away from any water source, in a small, shallow hole (also called a cathole).Read more here, meow....
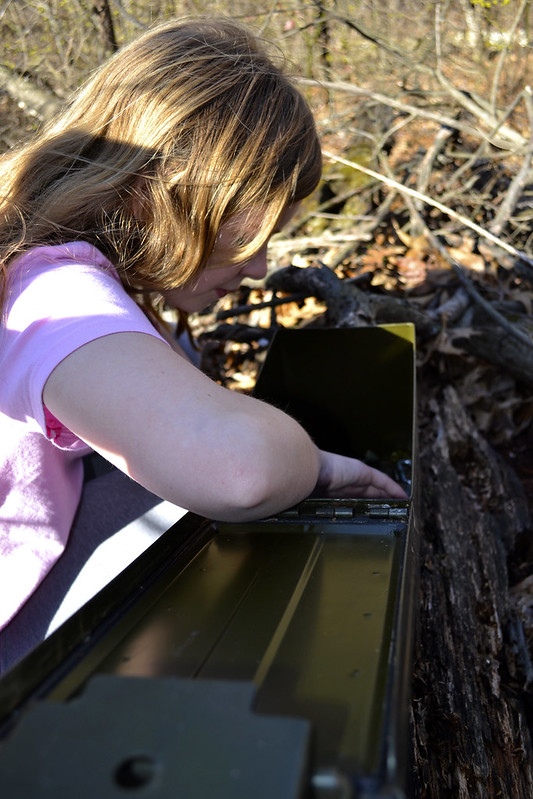
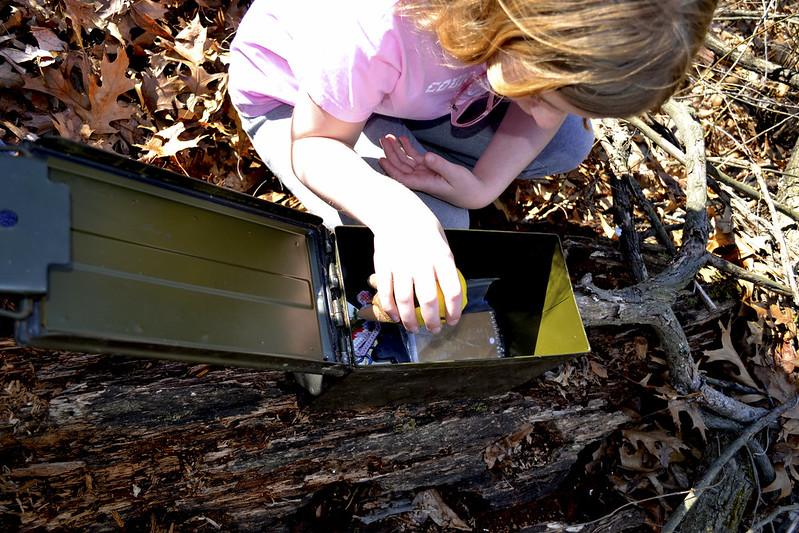
  • Be sure to use the self-registration boxes at the trailheads. This may very well save your life.
  • Try to find lesser used areas for resting and camping. Popular spots (sometimes referred to a user camps) and the constant use of these camping areas make it harder for nature to replenish herself in some areas. By finding alternative spots you can make her recovery a bit easier and find your very own bit of heaven.
  • Always try to camp out of sight.
  • Be prepared. Have a first aid kit, plenty of water, bug repellent (I have a recipe of one you can drink!), a map of the area, compass, the right clothing and shoes as well. Think ahead.
  • Don't count on your cell phone to rescue you. Many of these areas are outside of the cell service range. Don't forget, you came here for a reason, so don't turn it on unless you really need it or at least keep it on silent.
  • As often as possible stay on the trail when hiking. 
  • Limit your group size to 10 or less.
  • Many of these areas are surrounded by private property, ALWAYS respect these boundaries and the land owners as well.
  • Keep campfires (if needed at all) small. Fire rings should be avoided as they show man was present. Small gas or chemical stoves are preferred. Always practice extreme fire safety and be aware of the current conditions.
  • DO NOT TRANSPORT WOOD FROM HOME for campfires.
  • Leave what you find. Don't take it with you. Take a picture instead.
  • It's worth mentioning again, if you pack it in, you pack it out.
Most of all enjoy the solitude, enjoy the lack of urban sounds, and enjoy those you are with in the Wilderness.

History & Today
The Wilderness Act just celebrated its 50th Anniversary this year! It looks pretty darn good for 50, wouldn't you say? Wilderness areas came about in 1964, when Congress passed The Wilderness Act of 1964 and President Lyndon Johnson signed the bill into law. This act created a legal definition of what a wilderness is in the United States and set aside 9.1 million acres of land aside under federal protection. It also provided us with an eloquent definition of a United States Wilderness Area:
“A wilderness, in contrast with those areas where man and his own works dominate the landscape, is hereby recognized as an area where the earth and its community of life are untrammeled by man, where man himself is a visitor who does not remain.
Lyndon Johnson signing the Wilderness Act of 1964
President Lyndon Johnson finishes signing
The Wilderness Act of 1964
The act itself had taken over 8 years of work and gone through more than 60 drafts and spanning three presidencies. Today the Wilderness Act protects over 106 million acres of federal land and these areas are administered by four federal agencies; The National Park Service, U.S. Forest Service, U.S. Fish and Wildlife Service, and The Bureau of Land Management. The National Park Service covers the largest amount of Wilderness areas at 43,616,250 acres, with the U.S. Forest Service in second with 34,867,591 acres, then the U.S. Fish and Wildlife Service at 20,699,108 acres, and Bureau of Land Management with 6,512,227 acres.

Congress considers adding additional Wilderness Areas each and every year, with some being recommended by concerned citizen groups,federal agencies, grassroots organizations and others. In fact, Congress voted unanimously to protect over 32,000 acres of Sleeping Bear Dunes (in Michigan), the first wilderness area to be added in five years. There are also rumors that the administration is making plans to preserve two additional areas as well: The Organ Mountains-Desert Peaks area in New Mexico and Point Arena-Stornetta Public Lands in California.

More Information:
Visit Local Treks on facebook!
Wilderness.net The BEST source I know of to locate a Wilderness near you.
Full Information on The Wilderness Act of 1964 via Wilderness.net
Wikipedia on The Wilderness Act of 1964
Leave No Trace: Center for Outdoor Ethics an EXCELLENT resource on outdoor manners.
Wilderness Manners: Sierra Club another EXCELLENT resource on outdoor manners.

Monday, February 24, 2014

320 Millions Years Well Spent: Garden of the Gods, IL

Garden of the Gods, Sit and Overlook
Be sure to take time to soak in the natural beauty of the area.

The exquisite sandstone formations located at Garden of the Gods Recreation Area, located in Illinois, took nearly 320 million years to form and, in my opinion, every single second has been very, very well spent. The area boasts truly awe inspiring vistas that beg to be fully taken in, small well worn trails that beckon you to lay tread to, and unique formations that are instantly recognizable, such as; Camel, Mushroom, and Anvil Rock formations. This true Illinois treasure is one of the most awe inspiring locations I have laid eyes upon, and was reminiscent of views I experienced in South Dakota and Colorado, only far, far closer to home!

Devil's Smokestack, Garden of the Gods IL
You can't miss the Devil's Smokestack!
Garden of the Gods Recreation Area boasts over 3300 acres of forest in the counties of Pope, Saline, and Hardin, with 5.5 miles of interconnecting trails spread throughout. However, the most popular trail by far is the quarter mile long Observation Trail. This well maintained and traveled interpretive trail will have you gazing at some very interesting rock formations such as Monkey Face, Mushroom Rock, Table Rock, Camel Rock and the Devil's Smokestack. In just a few short seconds, you'll easily be able to make out each of the namesake rocks as you stroll along the trail, take care and watch your step though, the smooth sandstone beneath your feet may be slippery when wet. Before venturing down the trail be sure to read the large informational signboard that contains background on the natural history and geology of the area, there will be additional interpretive signs along the trail as well pointing out even more interesting formations and history. Honestly, I don't want to give away too much on this short hike, it is a path best experienced rather than explained.

Interesting outcrop
Interesting outcrops are EVERYWHERE!
If you are heading out to the Garden of the Gods be sure to wear comfortable shoes because the rocks, cliffs, and chasms BEG to be climbed upon and explored. No matter your age, I can guarantee that you will hear a small voice from within asking "What do you think you can see from up there?" and before you can even consciously reply, your body will be moving forward, ready to discover the answer. I'd also suggest that you pack a lunch as there are many places along the trail to stop and rest, allowing you to really soak in the surrounding beauty, and these spots are perfect for small picnics (just be sure to keep the area beautiful by picking up all your trash, please, remember ).

Scenic overlook after scenic overlook is what you can expect.
I also want to let you know that this area is one of the busier parks that we have visited, on any given nice day I can assure you that you will see many other hikers and nature lovers out on this trail. In fact, on our summer visit the area was downright crowded in some spots (but you can always find some spots to have to yourself for a bit). So if seclusion and solitude is what you seek, you may want to hit a portion of the River to River Trail, which runs through Garden of the Gods. However, I can't stress how splendid the views are from the Observation Trail and missing them is darn near criminal...

Ever wonder what a tree eats?
For those of you interested in longer journeys, this makes a fantastic starting area to traverse a portion of the 160 mile River to River Trail, which blazes through the Garden of the Gods Recreation Area. The Garden of the Gods Recreation Area can also satisfy those of you looking to "rough it" a bit, with year round camping at the Pharaoh Campgrounds, but be sure to bring what you need with you as the nearest town, Elizabethtown is about a 20 minute drive away. Campsites are rented for $10 on a first come, first served basis.

Garden of the Gods Recreation Area and the Observation Trail make an absolutely fantastic family friendly day trip. I can assure you that after a day of bouncing among the boulders, shimmying along the outcrops, and traveling the quarter mile trail, your curtain climbers will be tuckered! Just be sure to pack a light snack or lunch and follow some of these tips for a great day hike. You may want to include a couple of band-aids though, just in case of a scraped knee. Just be sure to take time to revel in the splendor of the area and have fun!


More Information:
Visit Local Treks on facebook!
Tips: How To Take A Great Dayhike 
Shawnee National Forest - Garden of the Gods
Pharaoh Campground Information (Nearly halfway down the page)
My Flickr Garden of the Gods Photos
Garden of the Gods Trail Map (via ShawneeNationalForest.com)
Illinois Wildflowers (online guide with pictures)
National Geographic "Backyard Bird Identifier"


View Larger Map

Wednesday, August 28, 2013

How To Take A GREAT Day Hike

Local Treks Hiking: Single Red Leaf

We've all been here. The TV weatherperson just called the upcoming weekend the "very best ever!" and the smiling sun graphic behind them has you wanting to get out, get in touch with nature, breathe in a bit of fresh air and nab some exercise while you're at it. If you're looking to hit every one of those points out of the park, get on out and take a day hike. If you follow a few simple steps, I'm sure you'll find that a day hike is simple, easy and TONS of fun.

Local Treks Hiking: Millstream View
Where do you want to go?

This is the most important question you can ask yourself before getting into the "meat" of your potential hike. Head to the internet and search your local state and national parks, or better yet read a review or two right here on the blog. If you haven't hiked much you may want to keep your hike short, seeking out 1-2 mile "loop" style trails, be sure to allow yourself plenty of time to soak in the beauty of your surroundings. A loop trail will make a circle and upon completion should take you right back where you started, at the trail head.It is always best to find a topographic map as well, be sure to look at the elevation as every mile hiked up 1000 feet will feel like three miles hiked flat.

Local Treks Hiking: Climbing Tree
Wear the right clothes.

I like to wear loose fitting clothes, not so loose that they may get in my way in an attempt to trip me, but loose enough that they don't bind me or feel restrictive when I walk, climb or scramble over rocks and boulders. If you want your clothing to run double duty for you be sure to wear light colored clothing, to help avoid ticks. You may also want to spray your clothing down with an insect repellent that contains 20% DEET or make your own homemade bug repellent to keep nasty insects at bay as well, keep in mind, insect repellant doesn't last forever, you'll have to re-apply (usually after 2-3 hours). You may find some good deals on outdoor clothing online, I've found some good deals at The Clymb (you'll need to register though).

Local Treks Hiking: Hiking Shoes
Wear the right shoes.

You don't have to wear hiking boots when hiking, in fact, I don't even own a pair. Personally, I prefer a pair of trail running shoes (or just regular tennis shoes), they are light, responsive and I've found that they grip the trail and rocks quite well. Just be sure that these shoes are comfortable and for the love of Pete, don't ever, ever, ever wear a brand spanking new pair of shoes or boots into the woods. You're begging for them to be ruined and get some wicked blisters as well, always be sure to "wear in" your shoes before really tackling any trail mileage.

Local Treks Hiking: Little Grand Canyon Trail

Find some hiking buddies.

If you're able, grab a few friends and take them with you, bonus points are given (but not rewarded) for nabbing up pals that are experienced hikers. Better yet hop on the Local Treks facebook page and see if anyone else is interested in meeting up! For my fellow hikers that love to take to trail with friends of the hairy and four-legged design, pay special attention when researching your hike as not all state or national park areas allow for pets, even leashed. Let other folks know that you are leaving, even if you're heading out with a group, be sure to indicate where you are heading and what time you expect to be back.

But, I "Vant to be alone"...

Ok there Garbo, not everyone enjoys the outdoors with others. I know that some seek the solace and tranquility that can only truly be attained through absolute "aloneness" and from time to time I dig doing this myself. But before you leave, be sure to let friends and family know where you are going, what time you expect to return and tell them you'll call them once home. Should something happen to you while you're out hiking you'll thank your lucky stars you did this.

Local Treks Hiking: Cut Tree Trail

Pack smart and pack light.

Going on a day hike with a 25 pound pack on your back, most likely, isn't going to result in a "good time". No one is the same, so be sure to make a checklist of what you need to take with you. When I hit the trail I take a small backpack (the same type that kids truck their books to and from school with, a cheap old Jansport):
  • A pocket knife: Conveniently placed, you guessed it, in my pocket...
  • A lighter: I don't smoke, but should something go wrong I want to be able to start a fire, for signaling, warmth or cooking. Also conveniently placed in my pocket.
  • A cell phone: Turned off and placed in my pocket. Nothings more annoying to you or other hikers than your ringtone of awesomeness over the sounds of nature.
  • A compass: It's always comforting to have one of these with you, learn to use a compass and map (it's easy) correctly. Placed in my pocket.
  • A printed map of the area: This is a must. Don't hike without a map of the area, it's that simple. If you get lost this could save your bacon. Maps usually have interesting sites and attractions marked as well, so it helps to keep an eye out for landmarks and potential, slightly off trail, sites. Folded and stuck in my pocket.
  • Water: I've heard that 3 liters per hiker is adequate, I take a 2 liter Stanley vacuum bottle filled with ice water and another 1.5 liter stainless steel water bottle on my hikes and that is plenty of water for me. When hiking with the family, I'm the mule, although my wife will carry water as well. Please don't drink the water on your hike unfiltered, unless you absolutely dig diarrhea, and cramps, and pain, and possible death.
  • Food/Snacks: I love peanut butter crackers. Love em. They make it into every single pack I take with me. I generally only pack food that can be consumed and safely carried at room temperature, so apples, beef jerky (mmmmm), trail mix, pears, oranges, fruit snacks, etc. However, just because you're eating a piece of fruit doesn't make you immune to "pack out what you pack in", keep those cores and peels until you can dispose of them properly in a trash can.
  • A small, but effective first aid kit: Here's what I have in mine; Band-aids, a few Ibruprofen, antibacterial ointment, rain poncho (can double as a little shelter if absolutely needed), 10' of para-cord, gauze, and medical tape.
  • A camera: It's simple. I don't hit a trail with out either my Nikon D3100 (and maybe a lens or two) or my little Canon point and shoot, depending on the length and difficulty of the hike.
Local Treks Hiking: Hypno Toad

Thank you for reading, hopefully this will help you the next time you decide to hit the trail.

Am I missing something? If you have any questions or comments or if you have something for me to add to the list above, just let us know, either here on the blog or on the Local Treks Facebook page.

Cheers!
More Information:
Map Compass 101 on YouTube by Packrat556
Leave No Trace - Wikipedia (Pack In, Pack Out)
The Clymb: A site to find good deals on outdoor products and clothing

Friday, August 16, 2013

For the Birds: Juden Creek Conservation Area & More!

We had passed the bird house topped ancient gate and the small sign, pointing the way to Juden Creek hundreds of times. It seemed each time we took a jaunt to Trail of Tears State Park we would say, "We really should drop by there" and then pass on by... But, something was different on a particular Sunday, something made us turn in to Juden Creek Conservation Area, and I'm glad that whatever unforeseen force pushed us to visit the small park did, because the questions raised on our hike provided me a better vision and understanding of the area and even a bit of its history.

First, here's the HIKE!
In order to get to the trail head, you will take Hwy 177 (Big Bend Road) north through Cape Girardeau, MO. You'll then turn right (East) on old Missouri Route V, then turn right on Cape Rock road. You'll discover the parking lot for the trail on your right. This fairly worn trail will take you through Twin Trees Park, across a narrow band of Juden Creek Conservation Area, and then ending (somewhat abruptly) in the Kelso Sanctuary Natural Area. This trail does have inclines/declines to it and is not surfaced, so I would consider it to be a "moderate" hike.

As we approached the trail head we were instantly aware of the wildlife, particularly the numerous songbirds, who chirped and sang as we began our journey. It wasn't far up the short ascent that the canopy of the hardwood forest quickly enveloped us as we made our way through the Twin Trees Park portion of the trail. A quick survey of the American Beech that are scattered throughout the woods provided me an explanation of why so many songbirds were to be heard here, as they love to devour the fruit of this tree. Interesting note on these Beech trees is that this is about as far West as you will find them, and one of the few places that they grow naturally in Missouri.

As we continued we noticed TONS of wildflowers just beginning to emerge along the trail, with nearly every color of nature's vivid palette brilliantly brushed on to their petals. I would find out only later, that this area is known for the migratory birdwatching and the wildflowers. In fact, Wildflower Walks are sometimes provided during spring by the Cape Girardeau Conservation Nature Center so be sure to check their page if you're heading out there!

In the trees we would occasionally spot odd, dark, egg-shaped canisters that we assumed were installed to serve as bird houses, in order to attract even more birds to the area, so that they may sing even more songs for trail goers. Many of these bird house seemed to have their entrances widened via the teeth of some squirrels or perhaps they were there to attract a different type of wildlife and had the entrances widened by man. If you may know what these canisters are there for, or what particular birds they may be attracting, please let me know. Despite my lack of knowledge as to whether or not man had widened these holes there was a distinct sign of man's impact on the landscape, the ravages of a suspicious 2009 brush fire, can still be seen on many of the trees and shrubs that line a good portion of the trail as it passes through the Juden Creek area.

Springdale Bird Sanctuary? Hmm.....
As we continued something else caught my eye. We began to see a scattering of signs for the "Springdale Bird Sanctuary", firmly attached to trees, yet I had never heard of such a place. Many of the signs were weathered and bent, some with the paint peeling, and others peppered with pellet holes. I began to wonder if we had somehow ventured into another park or conservation area, or worse, if I had begun to tread (unknowingly) onto private property. After doing a quick search of the area, and finding no evidence of us being on private property, we continued on the trail, noticing a small pond, just barely noticeable through the trees that the trail seemed to be winding around. This particular area seemed absolutely THICK with pileated woodpeckers, who seemed to stay close enough for us to catch quick, brilliant glimpses of their beauty, but quickly flying away milliseconds before my camera could fully focus on them. We would discover yet another type of sign, one indicating a nearby survey marker, but we could not find the marker the sign was designed to protect (or perhaps it protected the marker too well). Our journey on the trail ended at an old building foundation, with a man gazing at us from his backyard... We decided then it was time to head back.

Note that this is NOT a loop trail, or at least, it was not a loop trail on our experience. We did not go off trail and stuck only to the most worn portion, upon finishing our exploration of the old building foundation and waving to the staring man in his backyard, we simply doubled back and made our way back through the woods to the parking lot. But as we headed back, my mind was awash in questions on exactly what Springdale Bird Sanctuary was and why there was a gate topped with a single bird house, so...

Warning... History stuff below:
Kelso Sanctuary Natural Area began its life in 1937 as the Springdale Bird Sanctuary, when Judge and Mrs. I.R. Kelso donated 20 acres of land to the Audubon Society of Missouri in June of 1937, an additional 7 acres was added soon after. At some time during the 1960's or 1970's the area changed names to the I.R. Kelso Wildlife Sanctuary and I assume later changed to its current designation. As of today, the area consists of 23 acres of wooded area (according to the Missouri Department of Conservation), which is owned by the Audubon Society of Missouri and managed by the Biology department of Southeast Missouri State University. I have also read that the University has leased the land from the Audubon Society of Missouri for a dollar per year since 1962, that sounds like a pretty good deal to me! The Kelso Sanctuary has had multiple bridges, all of which crossed Juden Creek, and all of which no longer exist due to flooding. However, only one (of two originally) of the small birdhouses still tops the gate that led to the entrance and can easily be spotted from Hwy 177 (Big Bend Road) as you approach the Juden Creek Conservation Area turn. Rumor has it that there is a geocache located nearby as well...

More Information:
Juden Creek Hiking Map
Juden Creek Conservation Area
Kelso Sanctuary Natural Area
Cape Girardeau Conservation Nature Center
Audubon Society of Missouri Checklist for Juden Creek
Juden Creek Hike Set on Flickr

f/8 and Be There (blog on Springdale Bird Sanctuary history by Fred Lynch of the Southeast Missourian Newspaper)
Southeast Missourian Photo Gallery of Juden Creek Fire (Photos by Kit Doyle)
This is NOT the Home of the Birds (blog entry by Ken Steinhoff)


View Larger Map

Friday, August 9, 2013

Groovin' At Hippie Hole: Amidon Memorial Conservation Area

Looking downstream at the Hippie Hole
Taking the Right Fork...
Just a few weeks ago I did a short write up on the Castor River Shut Ins of Amidon, which were located just off the left fork in the road as we entered the Amidon Memorial Conservation Area. It was a quick jaunt down the well groomed and maintained trail to get a look at those gorgeous, smooth pink granite boulders that had been shaped and sculpted for years by the Castor River. After finishing the Jekyll and Hyde trail that looped the left area, I left a little "cliff hanger"... What was down the right fork?

A firestruck tree we found searching
for the mystery concrete foundation.
Well, I suppose I'll retrace my steps a bit, and get you out to the area again with a bit of old fashioned written directions. From St. Louis, you'll take I-55 South to US 67 South towards Bonne Terre/Farmington. After about 50 or so miles you'll need to take MO-72/US-67 BUS toward Fredricktown. At the roundabout (traffic circle) you'll want to continue on Missouri Highway 72, and follow to US-72/Missouri OO where you'll turn right, continuing on US-72 until you see a turnoff on Route J, you'll turn left onto Route J and then keep an eye out for Route W, which you'll take a right on. Follow Route W until you reach County Road 208 (CR 208) and follow that until it turns to a gravel/dirt road and you reach a fork in the road at Amidon Memorial Conservation Area, this time, we'll bear right and continue on CR 208!

Not far down the road from the fork, you'll find a parking lot on your left. If you "dig" (no pun originally intended) gravestones and old family graveyard plots, you can park here and search out the two small cemeteries that are located in the field. We searched for them both, but were only able to find one. We discovered it by hiking directly west of the parking lot to a small grove of cedars. There, in the shade of the evergreens were a few gravestones, to be honest, I haven't investigated those that are entombed there... That may provide another bit of an adventure.

Taking a pause by Hippie Hole in the Fall.
If you hop back in your vehicle and continue down further on CR 208 you'll come to what the area map has labeled as a "Deep Fjord-Caution". This is, in fact, an unaided crossing of the Castor River, think you're up to it? Let me begin with one quick note, never, ever, ever cross flooded, deep or rapidly moving water. Do not cross it on foot, do not cross it in a car, do not attempt upon a lamb and do not cross with green eggs and ham. In all seriousness, don't cross it, you could die. Now, with the pleasantries of possible death taken care of let's get to how you might be able to tell all your friends that you crossed the Castor River in your car! It's simple, after you've established that the water isn't too deep or flooded, find a line and then slowly cross. Don't fire it up there Evel Knievel style and gun it in an attempt to skip across, if you do that you'll run a risk of driving the water into your engine and killing it, just take it easy with slow steady pressure and poof, you'll be safely across. If it looks too deep or you're just a bit frightened of crossing a river in your car (perhaps it's the thought that the river may end up running through your car), you can safely park your car off the road and walk across if you like. In fact, if you just want to play in the water, this crossing area is a great spot to cool off and search for some crawdads hiding underneath rocks. But the real refresher lies about a half mile upstream, at a place a local swimmer we met called the "Hippie Hole".

Keep your eyes up too, you never know what may be up there!
Once you've crossed the Castor River, keep an eye out for a possible second crossing over Stannett Creek very soon after, same rules apply to this crossing, be safe please. After the short crossing of Stannett Creek look for a gravel parking lot to your left, this will be were you may begin your short trek to the Hippie Hole! The trail head begins there at the parking lot and will begin by taking you just on the outskirts of a cleared field. Here wildflower abound during the spring and birds seem to be nearly everywhere. Once to the far edge of the field you will enter into a more wooded area, here the trail is clearly visible, but be careful of exposed roots from the trees that line the trail, they can easily trip you up. This trail will wind alongside the Castor River, with a full canopy of hardwood trees surrounding you as you get closer to Hippie Hole. When the canopy opens up and you hit a gigantic solid mass of pink granite (like in the picture up top) you've arrived at the Hippie Hole. This is a great place to take a dip or even a jump or two!

Love these big pink boulders!
Once you've arrived at the Hippie Hole the trail, for the most part, ends. But don't let that stop you if you're up for a bit of adventure! We continued on, constantly keeping the river within view through the trees, heading ever northward. A local swimmer we met upon our initial arrival had told us of an old building foundation, somewhere "up there" with full finger pointing proximity, and despite our best efforts, we were unable to find it during our extended hike. However, we did find some absolutely beautiful rocks, some chock full of quartz crystals of different colors, and plenty of huge boulders to climb, jump and impersonate Spiderman upon! Also, if you're quiet (and we were), you may even walk up on some whitetail deer in this area. We came across a small herd of 5-6 as we crested a hill, and all of us had a bit of a shock! There are also plenty of squirrels, birds, small reptiles and wild turkey that play in the woods here. You could hike up to the Castor River Shut Ins by just continuing to follow the river upstream a bit over a mile or so, as well if you like.

Now, I referred to this area Hippie Hole and I'm no local. I've heard there are some that call it different names, while others have Hippie Hole in a different location all together... All I can do is count on that one local swimmer's account for the naming of this area, but of course, his directions to that concrete foundation weren't so great, so he may have been a bit off... But with cool waters to tread in and rocks to take a plunge from, I'll just call it a great old fashioned swimmin' hole!

More Information:
Amidon Memorial Conservation Area Homepage
Amidon Area Map (may want to refer to this as you drive from Fredricktown to Amidon for directions*)
Audubon Society of Missouri Amidon Bird Check List

*Note on map below... Google seems to use different terminology on some roads/rural highways, the path below should still get you to the area from St. Louis.

View Larger Map

Friday, July 5, 2013

Going On A Treasure Hunt: Geocaching!


Adding a geocache search, or two, or three can
add even more excitement to your hike!
While I was typing up the paragraph on our search for the geocache on the Peewah Trail in Trail of Tears State Park, I was reminded of just how much fun we have, as a family, searching for these little bits of hidden treasure. I'll admit, even as a supposedly full-grown adult, my eyes light up just as much as my daughter's each time we find a geocache, and I'm always anxious to see what is inside! My daughter enjoys trading out one of her trinkets for one of those contained within the cache, while my wife and I most enjoy looking through the log, noting where all those who found the container before us are from while we marvel at just how wide this community has become. Since our family enjoys searching for these hidden gems and we love to see the community get a bit larger and the logs contained within the caches grow and grow, I figured that I should write up a little bit more than a simple paragraph on what geocaching is and how you can get in on the fun too!

So, I guess I should start with the basics. Geocaching is, for the lack of a better description, a world-wide treasure hunt, where you navigate to specific GPS (Global Positioning System) coordinates in order to find hidden containers that may be as small as a pill bottle to larger containers the size of a metal ammunition box. Now, if you're like me, that GPS coordinates line is staring you in the face... It's saying, "Hey bub, this is complicated, you need to have expensive GPS equipment if you want ANY chance of finding a geocache." But here's the deal, that smart phone you carry, the one that has the GPS chip built in, can get you within 10-20 yards (or closer) of any GPS coordinates out there, and better yet, you didn't have to spend an extra dime! In addition to your GPS device or phone, you'll need to have a pen (for autographing the log) and maybe a trinket of some type to trade. Now, on to apps for the smartphone crowd.

For Android users the best I've seen available (remember this is all personal opinion) is CacheSense, which is available in a 30 day demo form at CacheSense Demo, now, there are others available just hit up Google and search for something along the line of "best apps for geocaching" followed by what type of phone or mobile operating system you use. For iPhone (and android operating system) I found the Geocaching by Groundspeak to be very beginner friendly and fairly easy to operate, but again, there are many out there, so don't take my word for it. One big minus for me on the whole Geocaching app by Groundspeak is that it's nearly $10 for the app, that seems pretty steep, but it integrates seamlessly with their site. I would just suggest that whatever app you use have an "offline" mode, so that you won't lose your geocache just because you lost your signal. Then it is a simple as either manually plugging in the coordinates of the geocache or downloading a file from a website such as Geocaching.com. If you use Geocaching.com to get your information from you will need to make an account, it only takes a second and its free.

So, while you're on Geocaching.com simply move your mouse cursor over the "Play" button on the menu bar, then select "Hide & Seek a Cache". The page there is pretty darn self explanatory, type in an address, a zip code, state or other area and click on the "Go" button. When we first began, we only did caches that were easy, and we started on a public trail near our home so the walking was easy. So once you've picked out your first geocache target, find the coordinates for your anticipated treasure hunt and enter them into your GPS device or app! All that's left now is for you to get on out there and find that cache.

Once you've found the cache (congratulations by the way!) be sure to sign the log book or log sheet and take a second to look at the names and locations of the fine geocachers that have found the cache before you. If you'd like to trade out for an item that is contained in the cache, well, I hope you brought something along with you, because the rules are, whatever you exchange should be of equal or greater value that that which you take. We really dig taking a few of the little figures you find in the $0.50 machines in supermarkets and such, we've also found that these are taken pretty darn quick, especially zombies for some reason. So, once you've signed the log and traded for a bit of something, or maybe just took a picture of the contents, you may want to log the your geocache find online at Geocache.com. Here is a short video on how to log a geocache once you've found it:


I hope all this helps and I'm sure that adding a geocache or two on your next hike will pay back in TONS of fun, just be remember to bring a pen and perhaps a trinket to trade with you. Let me know if you have any questions or want any additional information and, as always, thanks for reading and happy trails!

More Information:
Geocache.com - A great source information of all things relating to geocaching, a must hit for anyone looking to start!
Top Five Android Geocaching Apps - You don't have to take my word for it
Top 6 Android Geocaching Apps - In case you don't want to take my word or the link above's word...
Top 5 iPhone Apps For Geocaching - for the iPhone folks

If you like what you're reading, please share it with others. Look below there, hit up the G+1 or share this blog on facebook, twitter or who knows... Cheers!

Wednesday, July 3, 2013

Trail of Tears State Park II: Peewah Trail


After experiencing the beauty of Trail of Tears State Park while exploring the three mile Sheppard's Point Trail, we knew that our family would be heading back soon, this time to tackle a more "formidable" foe... The nine mile long Peewah Trail. Now, I say that the Peewah Trail is ten miles, and it is, but the beauty of this trail is that it is split into two completely different trails with two seperate trail heads, that forms a full on (if a bit askew) figure eight. These two sections of the Peewah Trail are simply referred to as the East Loop and the West Loop.

The "boys", Hudson (brown & white) and Hyatt, taking in a quick refresher
from one of the numerous creek crossings on
the East Loop of the Peewah Trail
The East Loop: The East Loop is approximately 3.25 miles long and is easily identified by its yellow blazes. This loop climbs the ridges and bluffs that overlook the Mississippi to the East and even features a small spur that will take you out to a scenic overlook (located 1.5 miles East of the trail head for the East Loop) so that you can get a beautifully clear picture of the Mighty Mississippi, in fact, if you find that the scenic overlooks just off the roadside are full, this viewpoint and the vantage at Sheppard's Point are excellent alternatives, and all but guaranteed to be less crowded during Bald Eagle season. This trail is a perfect example of what goes up, must come down. As you follow the bluffs and ridges along the Mississippi eventually you'll come to the descent into the bottom-land, filled with wildflowers (in the spring/summer), giant cane and even a few creek crossings. Of course, with the creek crossings the possibility of washouts and flooding are a possibility depending upon the level of the Mississippi, so pay attention and use caution during any creek crossing. As you are on the Western side of the loop, keep an eye out for the black and white blaze, indicating the connector between the East Loop and the West Loop.

Twisted and snapped trees can be found
from the 2003 tornado damage.

The West Loop: To access the 5.75 mile long West Loop, you may hit the trail head, located along the Overlook Road, just north of Hill Road or you can hit the connector from the East Loop, mentioned above. As you hike through the region, marked clearly with red blazes, you will notice areas with beautiful oaks and hickories lining the ridgetops, while sweet gum and sycamore dominate the bottom-lands, with a health amount of native ferns thrown in just for measure. While taking in the beauty of these trees you may encounter areas that appear to be "stunted", but they are not, we had a tornado ravage the area in 2003 and this trail shows the clear evidence of the tornado's path. This is a perfect way to teach the destructive powers of a tornado, as the downed and twisted trees are still easily seen from the trail. Of course for a child, these downed trees provide a perfect and fun opportunity to increase their climbing skills too! This damage is a great example of the resiliency of the forest when taken care of.

Searching for
Now, for our family this was a pretty long hike and in order to spice up the nature for my then ten-year-old, we decided to search for a few geocaches while out on the trail. If you are unfamiliar with geocaching, or think I just made it up, head over to Geocaching-The Official Global GPS Cache Hunt Site for all the information you could ever want, and a quick and easy look up for geocaches near you or your prospective hikes. For our hunt, we simply took our car GPS unit into the field with us and used the coordinate look-up function to place the marker on our screen, of course your unit may be entirely different, but the fact is, we didn't need a fancy pants hand held unit and nearly all smart phones have a GPS function built in and numerous apps are available for you to use, such as the Geocaching Toolkit, I have used this one myself so I can vouch for it. Keep in mind, there is a Geocacher's Code of Ethics and be sure to bring along something to trade for an item that you may find interesting, be sure to read where others who have come before you are from, it is interesting to find so many others who found your little "secret" stash! Another quick note as you look over the geocache entries, a "Muggle" is someone that isn't out to find a geocache or someone unaware of geocaching even exists, I'm not a big fan of the Harry Potter series and it took me a bit to figure out what the heck a muggle was.

The West Loop has a few creek crossings as well, Indian Creek is prone to flooding its banks and flash flooding is always a possibility during rain storms, so please be careful as you cross these areas. As with any area rich in water and cover, there is a great chance to spot wildlife on both trails, keep an eye out for turkey, whitetail deer, foxes, fat little squirrels and more. Concerning the squirrels, keep an eye on the sky, as we were convinced that one particularly fat little bugger was chucking branches and nuts at us, funny till you catch one on the noggin.

You may notice on the Peewah Trail Map that the West Loop is nearly bisected by trail that leads to a backpack camp located dead center of the loop. We did not explore this camp, but I can assure you, we fully plan to! In fact, we hope to use this as a refresher before taking on some longer backpacking trips this fall and next spring, so stay tuned for more information as we experience it.

Overall both trails offer fantastic hiking, well maintained and clearly marked trails (provided you know what you are looking for, so please print out a map), some breathtaking views and scenic spaces. We only encountered one other group of people out on the trail, another family, and immediately after they were out of earshot we were instantly transferred back into the solitude and serenity of the wild acres. The boys enjoyed all the smells and nature along the trail, while we enjoyed the family togetherness you can only experience on a hike. Even though we went during the late fall/early winter period there was still PLENTY to see and take note of, however, this trail would be truly breathtaking in early fall as the leaves change and the bottom-lands truly come alive in the early spring with a plethora of local wildflowers in full bloom at that time. I certainly hope you'll make time to explore at least one of the two loops available on the Peewah Trail, I'm sure you'll find it just as enjoyable as we did.

As always thank you for reading and let me know if you have any questions on the trail. If you dig the blog be sure to give it a +1 up there or subscribe with your email address up top, it won't bug you until the next update then. Happy trails till next!

More Information:
Flickr Gallery of Shots
Click here for Peewah Trail Map
Click here for Trail Listing in Trail of Tears State Park
Trail of Tears State Park
429 Moccasin Springs
Jackson, MO 63755-8295
(573)290-5268(573)290-5268


View Larger Map

Sunday, June 30, 2013

Hike Through History: Trail of Tears State Park and Sheppard's Point Trail

Trail of Tears State Park, to me, is that "homely" girl in the sappy love movie. You know the one that no one pays any attention to and calls a geek, then, suddenly, she lets down her hair and takes off her glasses to reveal she's smokin' hot! For me, that is the tale of Trail of Tears State Park and this gal seems to have something for everyone: fishing, swimming, horse trails, picnicking, camping, backpacking, beautiful scenic overlooks, bird watching (people "flock" from all over to watch the Bald Eagle migration), Mississippi River access, hiking and so much more!


Now, I am no stranger to Trail of Tears, in college, friends and I would escape our campus confines and seek out the coolness of Lake Boutin for a dip or cast of the line, while partaking a few tasty cold beverages and observing the local bikini-clad "wildlife". Here's a quick note to those that may wish to also take a dip in Lake Boutin, wear shoes or water socks. There are still some old school pop tops (I put in this picture link because I realized a lot of folks may have no idea what that is) buried in some of the sand here so protect those tootsies! However, I was a trail virgin to over thirteen miles of pristine and well maintained trails the park harbored and after a quick internet search found that the three mile Sheppard's Point Trail could be a great "go to" hike for me and the family!
The parasitic beech drop.
Photo found on Wikipedia

Trail  of Tears State Park is very, very well marked and navigating from place to place within the park is very easy and directions are clear and evident. Upon arriving at the Sheppard's Point Trail Head, we noticed a few other cars, but we would never spot our fellow trail hikers (or hear them for that matter). We unloaded and leashed our "boys" Hudson and Hyatt, snatched our water bottles from the cooler, tightened up our laces and hit the dirt trail that headed straight into the hardwood forest. As we hiked, white oak, American beech, cucumber magnolia and beautiful tulip poplars lined the trail, as the dirt path took us to the tops of ridges and into deep valleys. Beneath the trees we saw brilliant green ferns and I took special note to look out for a rare plant, the parasitic beech drop, siphoning nutrients from the roots of the American beech.

The trail itself has some condition issues in spots (holes and root growth) and can be steep in places, but each incline of the trail is slowly adding up to one heck of a view! Nearly halfway through the hike is an awe inspiring vantage of the Mississippi River and a perfect place to take a quick rest and recharge while watching barges and tugboats navigate the mighty (and muddy) river. This point is also a prime observation point for bald eagles, particularly during the winter months. Also watch out below, there are some great drop offs that you can perch on to garner an even better view of the river, or peer directly over the edge to watch trains travel with their goods along the rails below.

After taking our break and watering both ourselves and the boys, we began to complete the Sheppard's Point loop and once back at the car, we all found that the trip was beyond enjoyable, if not a bit rough traveling up and down though. It seems as though we would be back, and soon to take a trip on another Trail of Tears hiking route... The Peewah Trail.

More Information:

Sheppard's Point Trail Map

Trail of Tears State Park
429 Moccasin Springs
Jackson, MO 63755-8295
(573) 290-5268(573) 290-5268


View Larger Map

Friday, June 28, 2013

Better Safe Than Swarmed: Homemade Bug Repellent

You're never truly alone outdoors, there are nearly always some flying friends ready to grab a bite with you...
As I was writing the blog on the Little Grand Canyon in Illinois, I couldn't help but revisit the hike in my mind. Seeing my wife and daughter enjoying the outdoors with me, hearing the gentle gurgling of the water as it flowed to the canyon floor slowly cutting through the sandstone and feeling the sting of the swarming mosquitoes, ravenous for my sweet, sweet blood!

Anyone who has been outdoors will tell you, bugs can make your excursion an absolute nightmare, even if your journey is only as far as your front porch to enjoy a sunset. Those same folks, particularly if they've been out in the woods with mosquitoes, ticks and chiggers, would most likely recommend a bug spray that contains DEET (short for N,N-Diethyl-meta-toluamide, say that five times fast...) which is some pretty powerful stuff. Developed following the jungle warfare of WWII, DEET is very effective at keeping bugs (especially mosquitoes and ticks) at bay during your outdoor fun. Unfortunately, DEET may also have many health side effects which may include: seizures, severe rashes, insomnia, impaired cognitive functions, mood disturbances and I've personally watched it melt rubber from a flashlight in my hands. But, I have to be honest, this is my "go to" insect spray for outside (albeit in concentrations no greater than 30%, which has been shown to give approximately 3-6 hours of protection from insects), but I thought, what if I could make a cheaper, safer, more environmentally friendly recipe?

There are a lot of good things about making your own bug repellent, for one, you know everything that is going into the batch, so if you have allergies or find that particular scents make you ill, you can easily change it up. You can also change how concentrated the repellent is by adding or removing water from the concoction and, you may even want to cackle maniacally as you fully enter your "mad scientist" mode as you mix, children LOVE this part (so practice your BWAAH, HA, HA's). My guiding principal, as I channel my inner Dr. Doofensmirtz, is to stick to ten to twenty drops of essential oil mixed with around two tablespoons of "carrier" oil or alcohol, and I do like it straight, no chaser, no water. But if you're looking to add water, substitute it for no more than half of the "carrier" oil or alcohol. Want an even cooler pro tip? Want to make all of your friends say "Oh, wow, you're so smart?" Well, just add some aloe vera gel to any recipe to make it into a lotion.
Not even our buddy "Hypno-Toad" could have eaten all the mosquitoes, but I'm sure he enjoyed the buffet!
Plus carrying a toad in your pocket is strange... or some I'm told.

My Macho Mosquito Mix

  • 2 tablespoons of Vodka (bring out the cheap stuff for this)
  • 15-20 drops of Cinnamon Oil
Mix the two ingredients together in a small spray bottle, shake vigorously (not stirred...) and apply. Good for about an hour of protection and you can drink the leftovers! "Spray for you, spray for me..."

Don't feel like spraying it directly into your mouth? You can substitute or even combine other essential oils such as citronella oil (great for mosquitoes and easily found), rose geranium (found to be pretty effective against ticks) or even some eucalyptus oil (repels ticks, mosquitoes and lice). A further list is available below in the next recipe.

Are you looking to "get off the sauce", don't want the kids spraying your macho concoction into their mouths or fear a contact buzz coming on? You can substitute soybean oil (shown to be an insect repellant in its own right), any other cooking oil (olive and sunflower are recommended), rubbing alcohol or witch hazel (see below) for the vodka.

World Wide Witch Hazel Blend

  • 2 tablespoons of Witch Hazel
  • 2 tablespoons of water (if you want to dilute the mixture)
  • 10-20 Drops of any one of the following or make your own concoction:
    • Eucalyptus Oil (ticks, mosquitoes & lice)
    • Cinnamon Oil (mosquitoes)
    • Citronella Oil (mosquitoes & biting flies)
    • Orange Oil (fleas)
    • Rose Geranium (ticks & lice)
    • Vanilla Extract (biting flies & gnats)
    • Cat Nip (stir a teaspoon or so in to combat mosquitoes)
Just mix the ingredients above in a small spray bottle, then shake it, shake it, shake it, shake it like a Polaroid picture and apply. It should be good for about an hour of protection. Now, I can't officially vouch for this recipe, as I haven't yet tried it, but this (or multiple variations) recipe is red hot on my Facebook feed and the internet boards, so I figured I'd hop on the train. The recipe above will differ from many of the other online versions as I included a list of some essential oils and the insects they most effectively repel. I do not claim any responsibility for any warts that may appear on your nose, the sudden turning of your skin to green or any overwhelming desires to cruise about the skies on a broom resulting from the use of pure witch hazel.

Gnarly Gnat Gnabber Blend

This has been the year of the gnat in Southeast Missouri. Buffalo gnats have made any foray, even a simple expedition to the mailbox, a mix of flailing arms and muffled curses. After my local store ran out of a miracle mixture called "Buggins", I had to take to the internet and unleash my inner chemist for this quick and easy recipe, it's a very hard recipe to remember, so take notes... Ready?
  • Pure vanilla extract
That's it... It rubs the extract on its skin or else the gnats return again (horrible, horrible reference) or you can place it in a spray bottle and spritz away. It will work fantastically for about 30 minutes of pure gnatless bliss, before you'll need to reapply. For an added punch, add a bit of citronella oil (1 part citronella to 3 parts vanilla extract) to keep mosquitoes at bay too.

Where To Find Ingredients

As for where to find essential oils, look at your local Wal-Mart (they carry some), Hobby Lobby, or local craft store. Many of these are used in soap making or loaded into those scent warmers you see in nearly everyone's home. If you still can't find any, well, you obviously have the worlds largest shopping mall at your fingertips... Type in Essential Oils for sale into Google and BOOM! To lazy to type? Then click HERE...

Please Share Your Results, Recipes And Thoughts With Us

Please let me know if you have any secret family recipes you may be willing to share or let me know if these concoctions work for you. Of course, be sure to test the essential oils on a small patch of your skin, you may have an allergy you aren't even aware of, so check before spraying this stuff all over your nether regions and beyond! Finally, when using these homemade remedies, keep one thing in mind, they will not work as well as that Deep Woods Off! with the 25% DEET in it, but they will work and most likely, better than you think!

Thanks for reading!