Wednesday, September 2, 2015

Giant City State Park: Devil's Standtable Nature Trail


After taking in the history and spectacular view from the Stonefort Nature Trail we piled back in the old family truckster and set our sights on the Devil's Standtable Nature Trail, which was to provide a bit more of a strenuous hike and a fantastic opportunity to get in a bit of boulder hopping and rock climbing fun for me. This was another short trail, winding another one-third of a mile into the beautiful forest, and the cherry on top, the Devil's Standtable itself, was well worth the short trek. However, if you find yourself wanting to take a seat at this table you may want to bring along a mighty large chair

The Trail!

The trail begins as gravel filled forms, which create a bit of a stair case, and quickly makes its way to a dirt surfaced trail that follows the bottom of its magnificent sandstone bluff borders. As you make your way along this trail you will find numerous spots that sections of the beautiful bluffs have shaken loose from their native homes, tumbling to the forest floor and as you near the Devil's Standtable itself, you will come across a large, partially collapsed sandstone shelter which is a stone hopper's paradise! I enjoyed leaping from boulder to boulder and even doing my best "Cliffhanger" impersonation from a few of them. When I wasn't hopping from place to place, I noticed that some of these boulders had names and dates carved upon their surface, unknown to me, this was to be a bit of a foreshadowing of our next hike through the Giant City Streets.

Please, Exercise Caution

The official trail ended at a wonderful spot from which to gather a ground level view of the Devil's Standtable, but I wanted to get just a bit closer to this magnificent natural monument. Upon a bit of inspection I found a less worn trail that led to the sandstone base and quickly scrambled up the stoney incline. Let me tell you, at eye-level with the Devil's Standtable you'll surely be impressed with just how delicate the balancing of this formation is and just how fragile the difference between the Standtable staying perched upon its column or its possible plummeting from its lengthy perch! As always, I'll give warning here... Rock may become quite slippery when wet and there is always a possibility of slipping and falling while leaping, bounding, jumping, cartwheeling, flipping, climbing, sliding, handstanding or having any other type of fun on rocks. Children may also be able to get up into an area then be unable to come back down, so please always err on the side of safety.

Directions (click the Google Map below to enter in your address)


Giant City State Park
235 Giant City Road
Makanda, IL 62958
(618) 457-4836

More Information: 

Local Treks on facebook 
Giant City State Park Stonefort Nature Trail - Be sure to hit this trail too!
Giant City State Park Devil's Giant City Nature Trail - THE "go to" trail in Giant City

Giant City State Park - Official IDNR Homepage
Giant City Trails -  A list of all eight established trails
Giant City Visitor Maps - Maps provided by the IDNR of the entire park
More Photos From Giant City State Park - My Flickr Album for Giant City State Park

Monday, February 9, 2015

Using A Compass: You Can Go Your Own Way


Fleetwood Mac had it right, "You Can Go Your Own Way" anytime you like when you're out hiking and you don't need to be a Meriwether Lewis or William Clark either. All you need is a compass, a map and the knowledge of how to use it. Here's a how to on what a compass is, what parts make up the compass and how to put it all together with a map in order to find your way. Fist pumping is advised...

What's this "Twisty Thing"? - The Parts

Let's start of with some compass basics. How about we learn what the different parts of the standard compass are? Here's a quick list of what you'll find on your standard compass.


  • Baseplate: The baseplate of the compass is the clear, rectangular plate that the compass housing is attached to. It may have a ruler on one or both edges and many items printed on it. Such as the orienting arrow and orienting lines.
  • Direction of Travel Arrow: The direction of travel arrow is usually an arrow which is printed on the baseplate. It will point AWAY from the compass housing and magnetic needle.
  • Compass Housing: The compass housing is the plastic circle that contains the magnetized compass needle and some type of "mystery" fluid (I don't recommend cracking it open to take a swig of it).
  • Degree Dial: The degree dial is a numbered dial that surrounds the compass housing. You can twist this dial 360° around the compass housing. This is also the answer to the question in the heading up there...
  • Magnetic Needle: Channel your inner child and spin while holding the compass close to your body and look at it. See that two colored needle that turns as you do? That's the magnetic needle, it will always point to Magnetic North.
  • Orienting Arrow: The orienting arrow is the non-magnetic, non-spinning, arrow that lies below the magnetic needle, it is usually printed on the plastic.
  • Orienting Lines: Orienting lines are lines which are printed inside of the compass housing and run parallel to the orienting arrow.

How Do I Hold This Thing?

Now that you've familiarized yourself with the parts of the compass, let's talk about how to hold it. Oh, and if you're still spinning in a circle from the magnetic needle definition you can stop, unless your inner child is just having too much fun. Now place your hand, palm up and level, in front of your chest. Next, take the compass and place it in your upturned hand. Boom! That's how you hold it, be sure to keep the compass as level as possible in your hand. If you would like to celebrate with a fist pump, be sure to pump only the compass-less hand.

What's that? You don't want to just hold it in your hand or you want to consult a map? Well, fine then. Take your map and compass, find a nice flat and level location, then lay your map down with your compass on top of it. Once you have it all down you may now fist pump either of your paws in victory.

Now Let's Figure Out Which Direction You're Facing

Look at you, all fist pumping and knowledgeable now! Let's add to your newly found orienteering skills by figuring out which direction you are currently facing.
  1. Hold the compass flat in your hand and look down on the top of the compass housing. The magnetic needle should swing off one way or another, unless you are facing to the north. 
  2. Now, grab the degree dial (you know, the twisty thing...) and turn the dial until the orienting arrow lines up with the magnetic arrow, it should outline it to be a bit more precise. 
    • Nearly all magnetic arrows are two toned, red and white, line up the red side of the magnetic arrow with the orienting arrow. In fact, if your compass doesn't have a two toned, red and white magnetic arrow, buy one that does. Be sure to check your instructions that come with your compass though, just to be sure.
  3. Finally, spot your direction of travel arrow, remember it is most likely printed on the baseplate. Follow the line from the backside of the arrow, through the compass housing and take note of where the line intersects the markings on the compass housing. In my photo above the arrow is between the N (North) and W (West), so I am facing Northwest.
  4. What's that? You want to get a bit more specific? Well, look more closely at your compass housing and see what degree the direction of travel arrow intersects with.

Did You Know There Are Two Types Of North?

Well, there are, at least when it comes to orienteering (that's a fancy term for using a map and compass to navigate). So now you're wondering, what are the two types of North? Wonder no more my fledgling explorer, the two types of North are True North and Magnetic North. Let's discuss each of those a bit more here. True North is constant and never changes, it is always located in the same spot and that is why it is referred to on your map.
  • True North (may also be referred to as Map North) refers to the point at which all the longitudinal lines meet up on the map, that's up there were Santa lives, at the North Pole. All legitimate maps are similar and have True North at the top of the map. But you see, here's the kicker, the Earth has these little variations in its magnetic field and, based on where you are located, your compass won't point toward True North, it will point to Magnetic North instead. 
  • Magnetic North does not refer to a static point on your map, like True North does. Magnetic North refers to the location on the Earth where our planet's magnetic filed points down. It will wander about...  In fact, during 2005 it was located off or the northwest coast of Greenland and is now drifting away further toward the East, toward Siberia. This is the North that your compass points to. Do you see an issue with that? Well I hope you do, because while the map's True North stays constant, the Magnetic North on your compass is slowly heading toward Russia. The difference that is created between True North and Magnetic North is called Declination.

Well, How Do I Compute The Declination?

I'm glad you asked that grasshopper! We use our maps and look for the UTM Grid, see image below, or you can visit the NGDC Geomagnetic Calculator and have the site compute up the most accurate declination available. I prefer to use the internet site before leaving on my hike and then writing the up-to-date declination on my map. For instance on my USGS Topo Map for Rock Pile Mountain, you'll notice that the declination is noted for 2001, that data is over 13 years old now and could result in me being off in my measurement for declination. If you prefer to use the map (and possibly old data) or if it is all you have available, here's what to do. First find the UTM Grid and Magnetic North Declination figure on your map, to see what it looks like glance at the image below.


Next, find the degree measurement between the line with GN (Grid North) and MN (Magnetic North), that number is the degree of declination, above it is 0½'. Then take note to which side of the star the measurement falls, to the West or East. In the image above it falls to the West of the star (True North), so the declination measurement was 0½ degrees West for my Rock Pile Mountain Wilderness map in 2001. Now, when I ran the location 37.43N by 90.42W (Rock Pile Mountain Coordinates) on the NGDC Geomagnetic Calculator today, I was given a 1 degree West declination, which is double the figure given on the map. That little difference can have me off by feet, yards or more of my destination, depending on how far I am traveling. So please, take my advice and get the most up-to-date measurements from the NGDC Geomagnetic site and write it down on your map. 

Finally, here's a little bit more. If Magnetic North is EAST of True North (the star on the UTM) then the local declination is positive. If Magnetic North is WEST of True North then the local declination is negative. Here's the thing, if your declination is positive, you will be SUBTRACTING the declination amount, if it is negative you will be ADDING the declination amount to your compass reading. My example above has Magnetic North to the EAST of True North, so I would be subtracting 0½' degree from my compass reading.

Did you follow all of that? If so, fist pump now. Seriously. That is a lot to take in and you are officially becoming an orienteering powerhouse!

Ok, Now I Have The Declination. What's Next?

Well, it's time to put it all together. For this you'll need your compass, your map of the area, a pencil/pen and your declination measured in degrees.
  1. Lay your map flat and find your starting point (usually the trail head) and your destination (also referred to as your map bearing).
  2. Using your starting point and your destination draw a straight line that connects your starting point to your map bearing (destination). You may use the straight edge of your compass baseplate to draw the line. Extend this line all the way through the map borders, this is called your "neat line".
  3. Be sure you are away from any nearby metal such as keys, belt buckle, cars, fences, Tony Stark (you know, Iron Man), etc., as metal objects may throw off your compass.
  4. Now, place your compass on the map so that the baseplate is parallel to the line you drew, your neat line. Be sure that your direction of travel arrow is pointing to your map bearing (destination).
  5. Remove the compass from your map and, with the direction of travel arrow pointing away from you, move your body until your red magnetic needle overlays your orienting arrow. Be sure you are holding the compass flat in front of you.
  6. If your local declination is positive (an East declination), then you will subtract the declination amount, meaning turn the degree dial clockwise that many degrees. If your local declination is negative (a West declination), then you will add the declination, meaning turn the degree dial counter-clockwise that many degrees.
  7. Rotate your body until the red magnetic arrow overlays your compass's orienting arrow
  8. Follow your compass to your destination, being sure to keep the magnetic arrow over your compass's orienting arrow
  9. Be sure to frequently check both your map and your compass as you make your way, it is easy to get off course and you may need to make adjustments as you are hiking.
  10. Fist pumping along the way is optional, but recommended. If you find yourself sufficiently pumped, making a "Choo! Choo!" sound along with the fist pump is allowed. Friends who are along with you may make a "Chugga, chugga" sound. Why should your friends make the "chugga" sound and not the "choo, choo" sound? Because you, my friend, are the conductor of this train, you blow the horn... Cheers.
See anything wrong up there? Anything you'd like to add? Like to show me a video of yourself fist pumping on down the trail? Let me know in the comments below or let me know on Local Treks on facebook. Thanks for reading and I hope to see you out on the trail!
More Information:
Local Treks on facebook 
USGS Topo Maps
USGS Education: How To Use a Compass
National Geophysical Data Center (NGDC) Homepage
NGDC Declination Calculator

Friday, January 23, 2015

MDC Offering Free "Discover Nature Girls Camp" - Kansas City Area

Courtesy Missouri Department of Conservation

As a father of a wonderful twelve-year-old, I have to admit... It's sometimes tough making the outdoors interesting. I love long hikes, the sounds, the smells, the freedom calls to me like an old friend and I relish ever single "conversation" I get to have with the great outdoors. Every step finds me a different view from which to marvel at her beauty. Now, that's me and my conversation with . Here's the conversation my daughter has with Mother Nature during a long walk: "O... M... G... Will it end?" That's why I keep our hikes short and I scout out most areas as well, it has to pass the "is there something cool or a big payoff on this hike" test. But I think anyone will tell you that the best way for a girl to have fun, well, it's with other girls!

Enter the Discover Nature Girls Camp

If you are looking for a way to make the outdoors more interesting for your daughter (or niece, granddaughter or just over all great girl that you love) who is between the ages of 11 to 15 and you live near Chilhowee, Missouri, you will certainly want to check out the Discover Nature Girls Camp, being held at Camp Palestine in Johnson County (see Google Map below for directions). According to the MDC site this is "a three-day, two-night camp that will introduce girls to outdoor skills in a supportive learning environment". The campers will be participating in skills including: archery, firearms safety, fishing, canoeing and water safety, with the MDC providing all of the necessary gear and materials. Who can beat that? Seriously... Who?

Registration Is Limited, So Act Now!

With a free deal this good you know there HAS to be a catch... And there is. You need to act NOW if you would like your favorite girl to participate as the Discover Nature Girls Camp is limited to 32 campers, with only the first 32 being admitted to the program. To request an application and apply for the Discover Nature Girls Camp, contact Agent Bartlett at (816) 835-6087, or call the Missouri Department of Conservation's Regional Office at (816) 622-0900. To find other GREAT programs near you visit mdc.mo.gov.

More Information:


Local Treks on facebook 
MDC Discover Nature Girls Camp webpage


Tuesday, November 25, 2014

Missouri Eagle Days

Taken by Adrian Pingstone in July 2004.

Did you know that Missouri is a top stop for many migrating bald eagles during the winter? Well, Missouri is actually a very popular "vacation spot" for our fine feathered friends, who are drawn to our state's large rivers, lakes and wetlands. In fact, all of our natural beauty, small game and habitat make Missouri one of the best spots in the lower 48 for avid bird watchers to spot a bald eagle.

In celebration of our winter visitors, and to bring attention to Missouri's year round bald eagle population, the Missouri Department of Conservation hosts Eagle Days throughout the state during the months of December, January and February, garnering you an excellent opportunity to learn more about our large flying friends through live captive-eagle programs, exhibits, activities, videos and MDC guides with spotting scopes. You'll be able to scan the water's edge and large trees for the more than 2,000 reported bald eagles, who may measure over six foot from wingtip to wingtip!

If you're looking to take advantage of the MDC Eagle Days, you'll want to hit up these locations during these dates (click to visit the area via Google Maps):
  • December 6 from 9 a.m. to 4 p.m. and December 7 from 10 a.m. to 4 p.m. at Squaw Creek National Wildlife Refuge. Contact number (816) 271-3100
  • January 10 from 9 a.m. to 3:30 p.m. and January 11 from 10:30 a.m. to 3:30 p.m. at Smithville Lake Paradise Pointe Golf Course Clubhouse. Contact number (816) 532-0174
  • January 17 from 9 a.m. to 4 p.m. and January 18 from 12:30 p.m. to 4:30 p.m. at the MDC Springfield Conservation Nature Center. Contact number (417) 888-4237
  • January 17 from 9 a.m. to 3 p.m. and January 18 from 9 a.m. to 3 p.m. at the Old Chain of Rocks Bridge. Contact number (314) 877-1309
  • January 24 from 9 a.m. to 4 p.m. and January 25 from 10 a.m. to 3 p.m. at Lock and Dam 24 an Apple Shed Theater in Clarksville. Contact number (660) 785-2420
  • February 7 from 9 a.m. to 4 p.m. at Mingo National Wildlife Refuge near Puxico. Contact number (573) 222-3589
    • Mingo National Wildlife Refuge is a personal favorite of our family! A great place to see a ton of nature...
If you'd rather avoid the guided tours and just take a weekend or weekday to try your luck at spotting a bald eagle, you may want to visit these sites (click to visit the area via Google Maps):
As always, enjoy and thank you for reading. I hope to see you out taking in an eyeful of eagle this winter. Please remember to bundle up though, Missouri gets C-O-L-D during these prime eagle viewing months.

Of course, if you want to get AMPED about the bald eagles, you may want to listen to a bit of this: Tick tock, tick, doo, doo, doo, doo... I wanna fly like an eagle, to the sea, fly like an eagle, let my spirit carry me...Hey, it sounds great when I sing it in my shower...

More Information:

Local Treks on facebook 
MDC Eagle Days Webpage
Additional Information On The Bald Eagle Photo At Top

Tuesday, November 18, 2014

Buford Mountain Conservation Area: Take Time To Take It Slow


In today's world it seems nearly everything moves fast and sometimes it may seem to move too fast. The week may speed by in a blur, leaving you to wonder... What did I do this week? What did I accomplish? Where are my keys? After a week like this, it's time to slow down. Way down. I just so happen to know that Buford Mountain Conservation Area is an extraordinary place to do it, and I will assure you, when you've finished the 10.6 mile loop you'll know what you did, what you accomplished, but your keys... Well, that's on you.

The (3rd) Top of Missouri: Big Buford

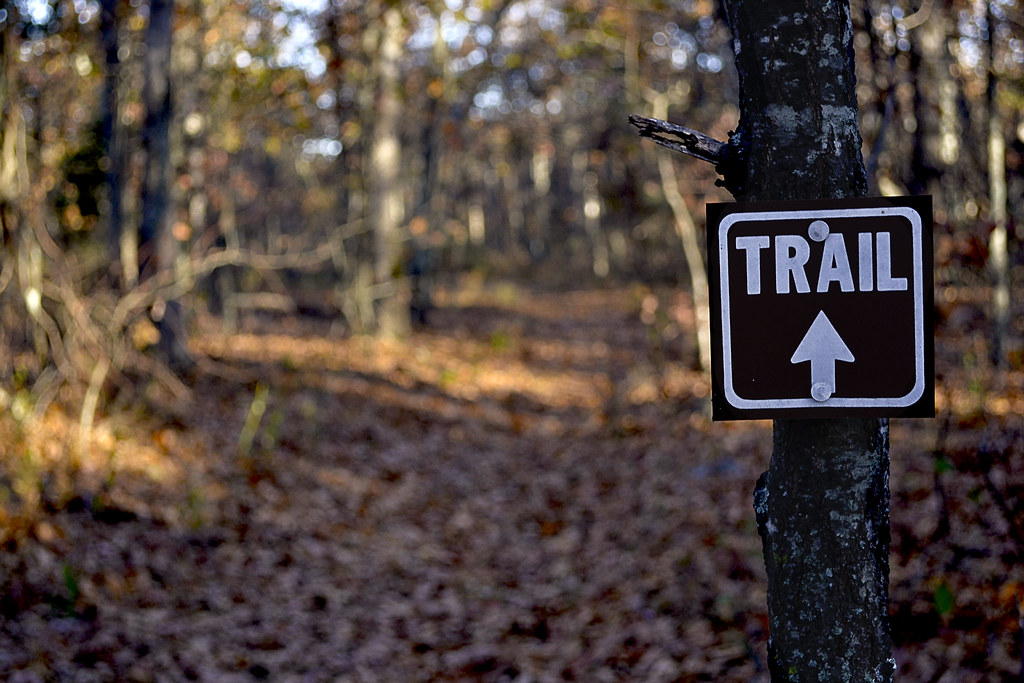
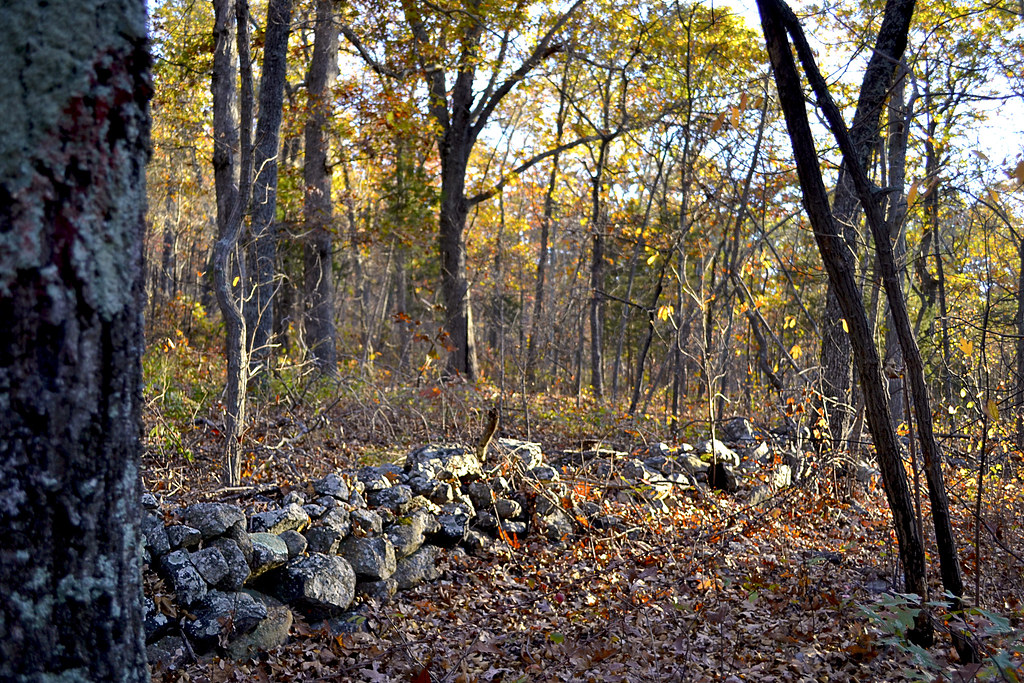
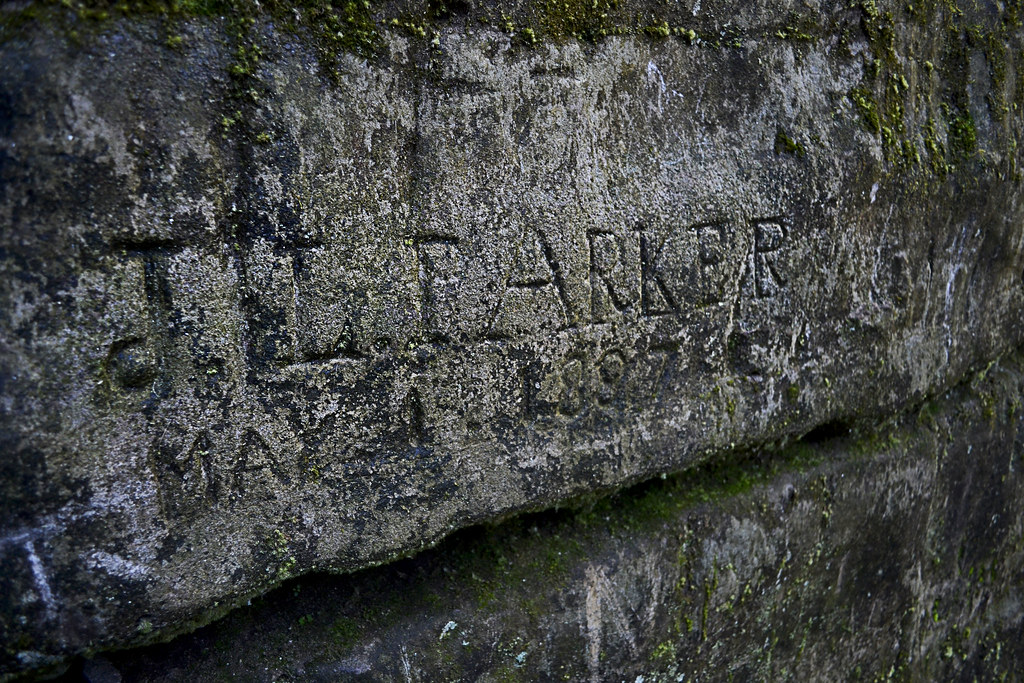
Keep an eye out for this low stone wall as you scale Big Buford.
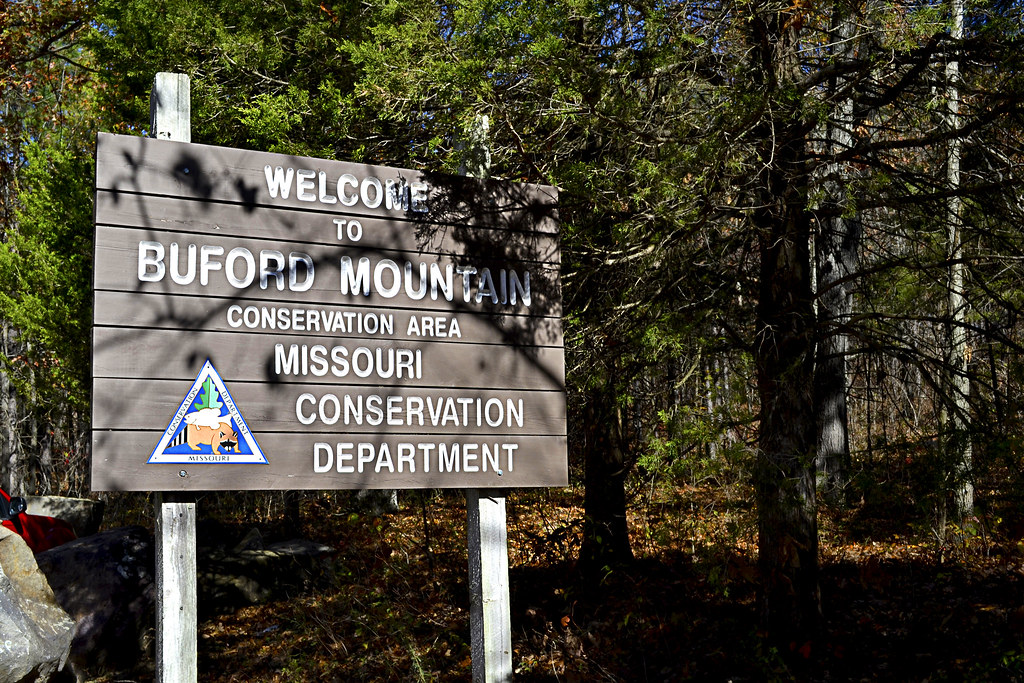
Buford Mountain Conservation Area is located just a few miles North of Ironton, Missouri off of the inconspicuous Route U. The mountain itself is actually more of a ridge, accentuated by a series of five high points along its spine. The first, and tallest point, on the trail has been nicknamed "Big Buford". As you climb its steep, rocky sides, keep an eye out for an old stone wall, evidence that early homesteaders laid claim to this area at one time, stone by stone. Big Buford peaks at 1740 feet above sea level, which happens to lay its claim to the 3rd highest peak in the state. How's that for a bit of an accomplishment? Hey, you didn't need any oxygen or Sherpas! Sure, not everyone may hold that to be a true Herculean feat, but I'll tell you what; after making the nearly 700 foot ascent to the wooded top of Big Buford over the winding rock and dirt surfaced trail, I'm pretty sure you'll feel a true sense of triumph. However, that sense of triumph may be slightly trumped by the fact that Big Buford is wooded, pretty heavily wooded in fact, and that makes for no sweeping vistas, no awe inspiring horizon to scan, no I Can See for Miles and Miles (I love The Who, don't you?) moment. But wait... Just put The Who on pause for a moment, because your Miles and Miles view exists just a bit further down the trail at a place called Bald Knob.

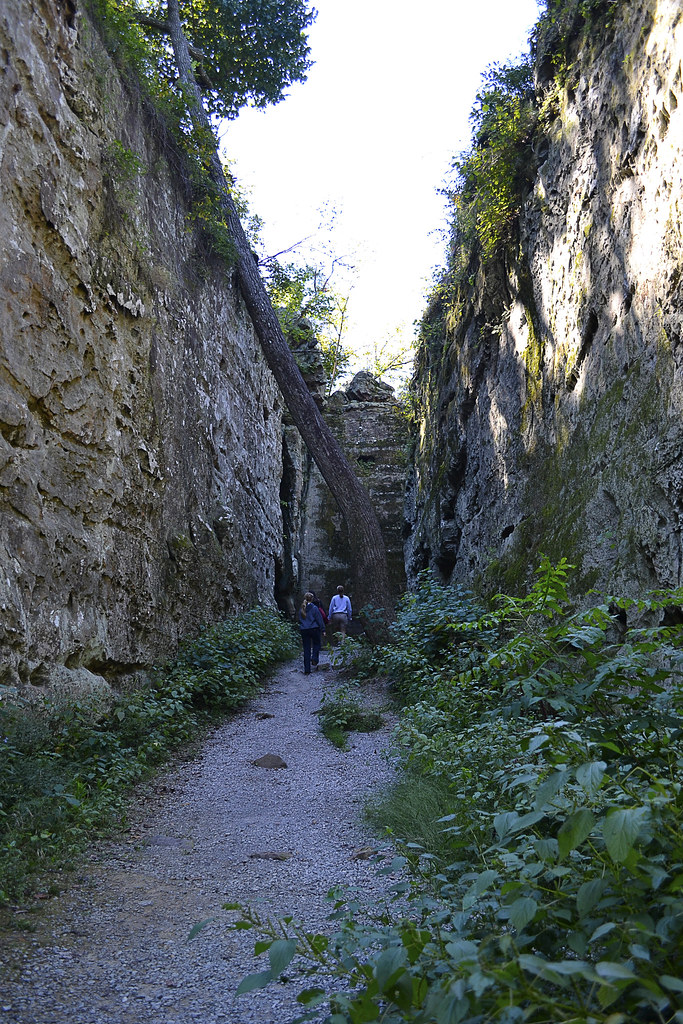
The "Moonscape": Peak Two

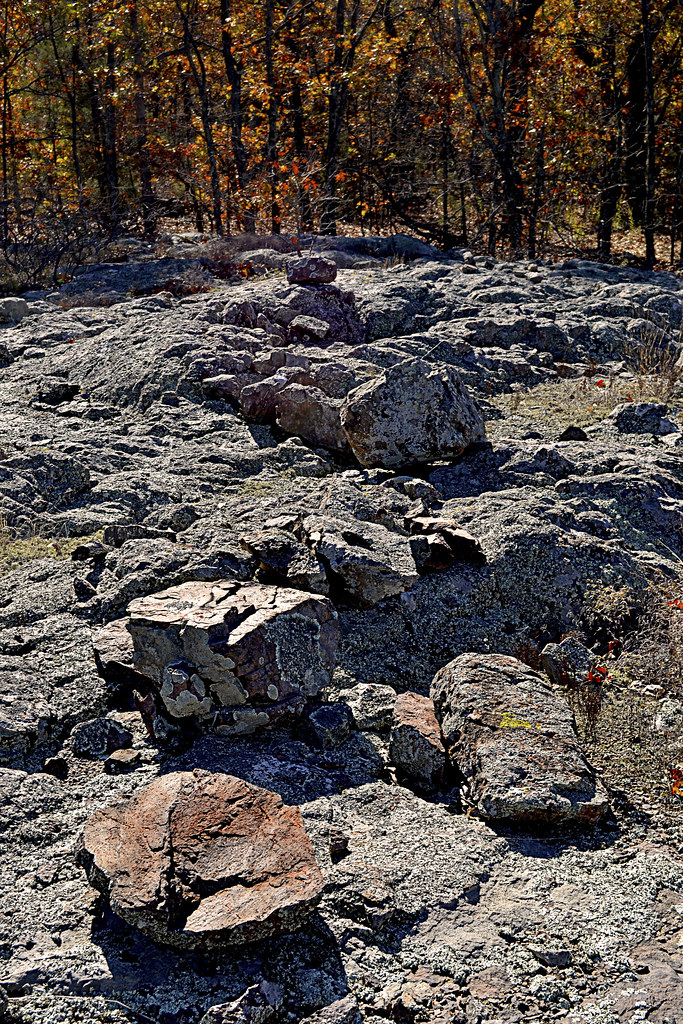
As you make your way toward the spectacular view at Bald Knob, you will first make your way over two more peaks and these aren't just "hike over" territory either. As you make your way down from Big Buford, keep your eyes open for the first of six wildlife watering holes which line this trail, placed there due to the lack of any real natural water source in the area. As the trail begins to once again gain elevation, you will find yourself near the second overall peak on the trail. It is here that the dense hardwood begins to make way for a very interesting formation of rock. It is here, at a touch over 1680 feet in elevation that the hardened granite stone of which the mountain is primarily composed of, known as ryholite, is completely exposed giving you access to your first encounter with one of a few "glades" located on the trail's route. It is this exposure that gave me a sense of what it must feel like to hike a bit on the moon, there is little vegetation, save for some lichen and moss growth upon the smooth stone floor, and I watched as the fall foliage, free from their tree moorings, swept across the desert like surface. I spent a few minutes here, one due to it being so beautifully stark and two... Well, I was a bit tired, that was two peaks one at 1740 and this one at 1680, in the span of about a mile.

The Fork: Peak Three

As you start descending from the "moonscape" second peak, you'll make your way past another wildlife watering hole and find yourself climbing back to around 1600 feet, by now I hope you've realized this trail is a quad burner. This third peak is similar to what you found at the top of Big Buford, a fairly heavily wooded peak with some large rocks scattered here and there. As you crest this third peak, you will soon find yourself at a fork in the trail that marks the beginning of the Buford Mountain loop. It is at this junction that you can continue left (Northwest) and head to Bald Knob or right (Northeast). Most visitors certainly bear on to the left trail and make their way toward the gorgeous view from Bald Knob, and that is the way I took. The trail is marked with directional arrows at this point too, although they may be somewhat obscured by forest growth. I'll be honest with you here as well, many hikers do not take the full 10.6 loop hike at Buford Mountain, many hike to Bald Knob and back, putting the total mileage at closer to 6.6 miles, which is still a pretty decent hike.

The View: Bald Knob


As you begin your climb up the fourth peak, you can begin to cue "Miles and Miles", because the forest canopy begins to quickly thin, and you enter another beautiful glade area as you near the top of Bald Knob. But, before you get to the official scenic overlook, you may find a less worn trail that leads off slightly to the West, following that faint trail led me to a wonderful appetizer of a view of the Belleview Valley below, complete with a small fire pit and boulders to perch upon. In fact, I thought I had stumbled upon the official Bald Knob view here and took a TON of pictures, not realizing that the actual infamous vista was really a few more yards to the North.

However, if you decide to stick to the main trail only, don't be worried, as you approach Bald Knob you will once again begin to 
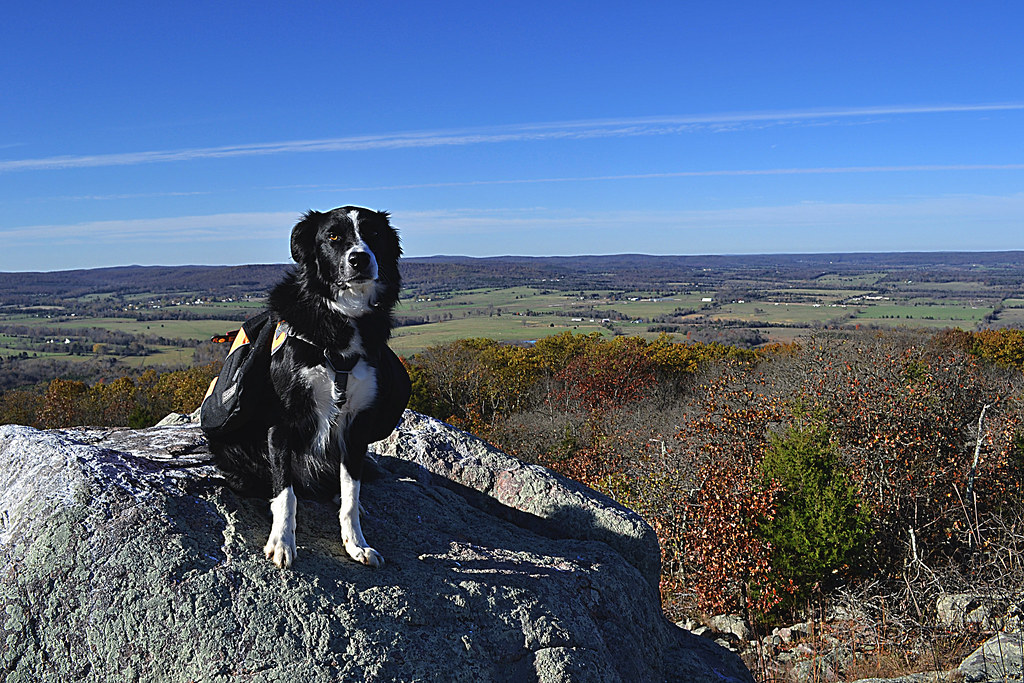
real Bald Knob overlook. It is at this overlook, at this time, no doubt with "Miles and Miles" playing softly through your earbuds, that you will be granted one heck of a view. A view that stretches over miles of the Belleview Valley will sprawl below you and if you've made this trek in late October you nay be treated with the brilliant fall pallet of oranges, reds, tans, and violets of the foliage. Quite simply THIS is the view you are looking for, and it is gorgeous. The overlook comes complete with a "posing" boulder, which will allow you to gain even a bit more elevation from which to survey your new kingdom from 1560 feet above sea level and maybe even snap a selfie or two. Even my hairy hiking buddy, Hyatt, had to get in on the view, he perched on the boulder, flashed me a toothy smile and I just had to take his picture...
see markers and signage. In fact, there is a rather large sign, complete with arrow that directs you quite well to just the right spot to take it all in.

The Rest: Peak Five & The Valley

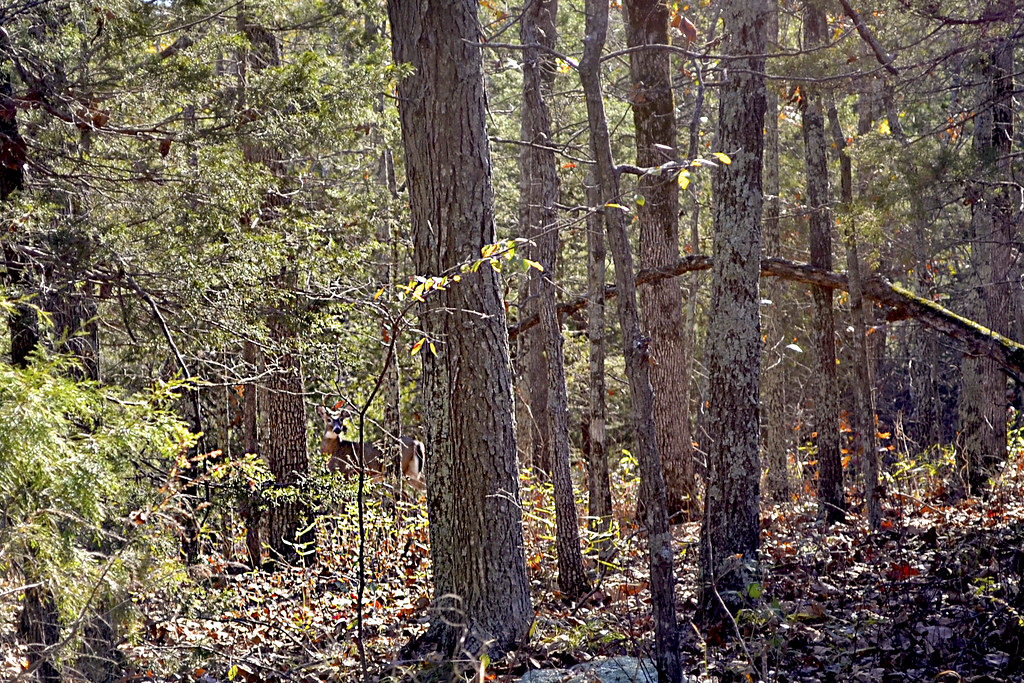
Can you spot the 4-pointer?
I'll be honest, after the view from Bald Knob the rest of the hike had a hard time keeping up. But honestly, I loved this hike. I had a hard time saying goodbye to the sweeping view offered at Bald Knob, but eventually made my way down the trail, passing another wildlife watering hole, and then back up to the fifth peak. At the top of peak five, many of the trees appeared dead, with brittle branches covered in lichens and moss, but the undergrowth was thick with many new saplings quickly reaching their way to the sun. I continued on and began to descend from the fifth peak and into the valley, which would comprise a good portion of the back side of the loop. As I neared the bottom, I was greeted by a large grove of cedars, and it was here that I nearly missed my turn to stay on the loop. There was a small arrow pointing to the East, but I missed it, luckily I caught a small break in identifying the trail seemed to split here. The odd thing about the split was that the "wrong" trail was better worn than the trail that continued the loop.

As I made my way through the valley, I concentrated on just taking it slow and taking it all in. Then, I came to notice a great deal of wildlife activity around me. Squirrels twittered at me from their lofty tree homes, I heard turkeys clucking in the distance and I was even lucky enough to happen upon a small four-point buck who was out grazing the plentiful acorns as noon neared. Which brings me to a quick warning, the MDC does allow hunting in this area, particularly hunting of squirrel, turkey and deer, so please be aware of any possible Missouri hunting seasons as you may want to postpone your hike or tread a bit more carefully and brightly than usual at those times.

Directions:


More Information:

Local Treks on facebook 
My Buford Mountain Flickr Album: More snaps from my hike through the area
Buford Mountain Conservation Area Summary Page: MDC Information
Buford Mountain Area Map: Provided by the MDC
Buford Mountain Area Information: Provided by the MDC

Google My Tracks Information:
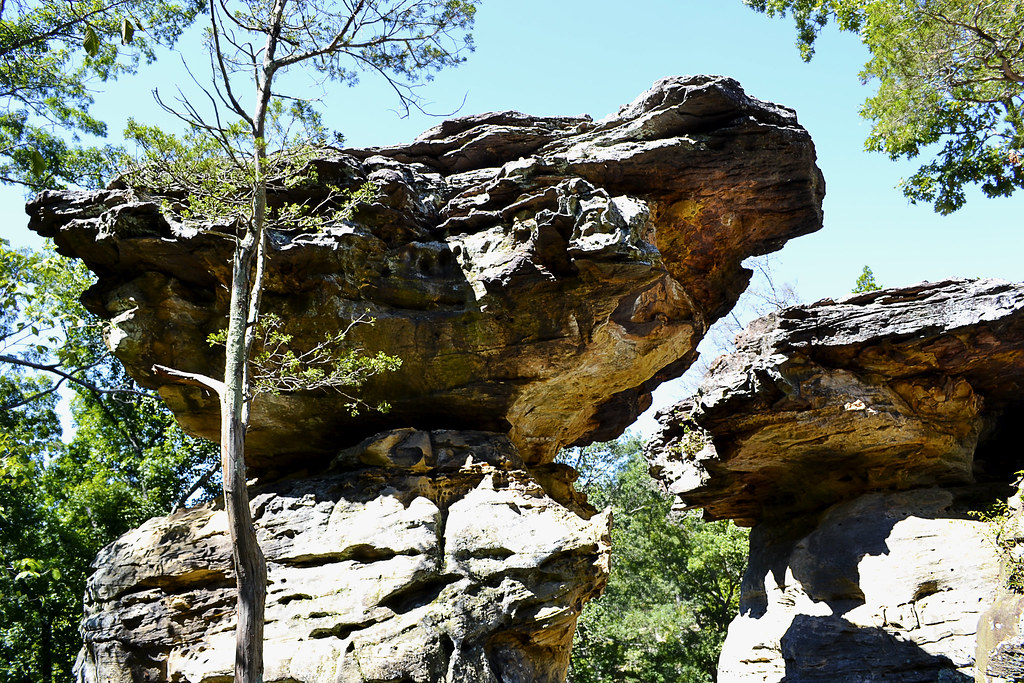
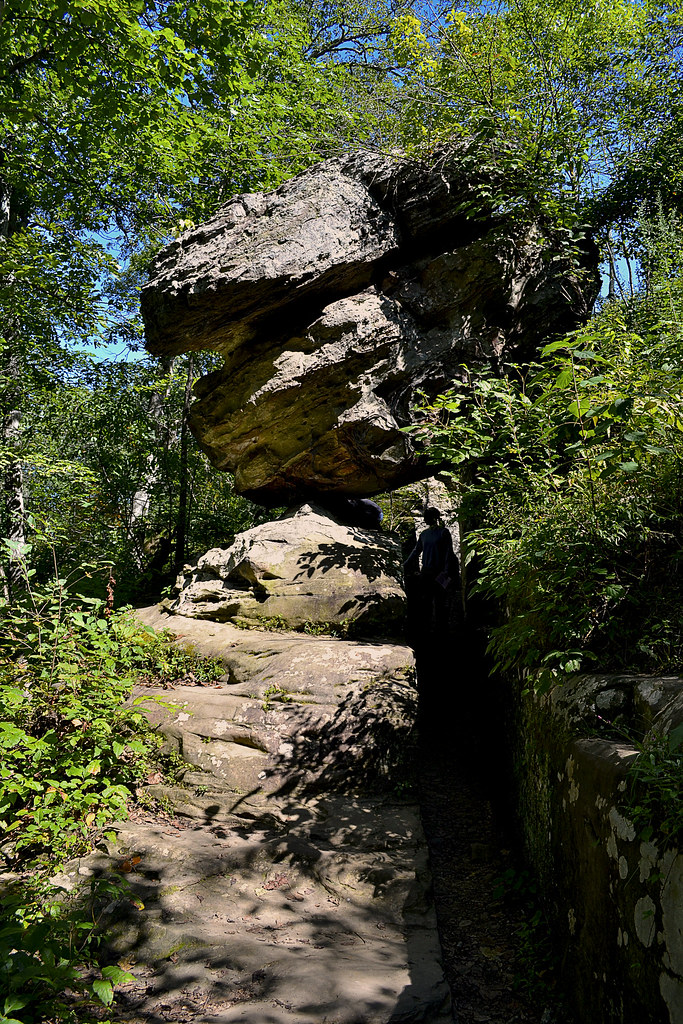
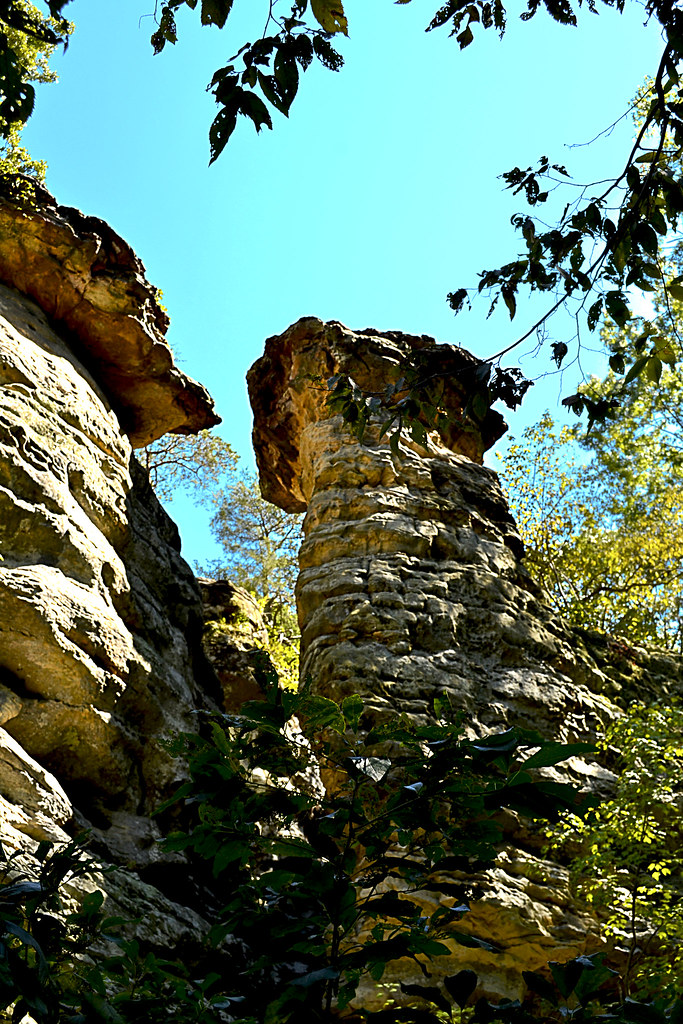
Tuesday, November 11, 2014

Giant City State Park: Giant City Nature Trail


There are times in which Mother Nature takes the subtle approach. She gently nudges you, providing you a wondrous moment or a special little insight to what makes her tick. And then there are times that she gets right in your face, causing you to be unable to look away, and assuring that you notice her grandeur, her beauty, her utter uniqueness... As you set tread to the Giant City Nature Trail be prepared, Mother Nature is moving in close, she'll be sure that after this short one mile loop trail you'll be fully aware of her rare and unique beauty.

The beauty of the Giant City Nature Trail certainly lies within its unique "streets". These passageways wind through colossal slabs of sandstone, which loom far above you and sending trees which look to grown upon their surface to grow quickly or never find the sun. Each of these large sandstone structures seem to form buildings which line the streets, with lines so straight they seem as though they could have only been carved by a master stonemason, as nature so often abhors presumed conformity and conventionality. But it is this seeming conformity, these straight, towering angular blocks which dwarf you and your fellow hikers, that make this area so unique from the rest of the park. In fact, this area is a bit reminiscent of the Panther Den Wilderness, only the Giant City Nature Trail is far more accessible and has a well worn trail to follow.

These massive stone structures have, no doubt, awed mankind for millennia, with man obviously attempting to leave behind their marks upon the stone, the same way that the stone had left its lasting mark upon them. If you inspect the walls carefully you may come upon a pair of names carved upon the sandstone walls in 1862, by Theodore Wilson and his brother Albert during the Civil War. The pair's stoney autographs have become a popular carving to seek out and if you look very carefully, you may be able to even make out the haunting face in the rock wall that opposes it. During our visit, someone had defaced the the Giant City Trail "face" by painting an outline around the image, hopefully with time the paint used will fade and the face will again become a bit more eerie. Time may slip by quickly as you read the many inscriptions upon the walls, searching those breadcrumbs left which bare silent witness to those explorers who shared this same trail, same route, same beauty with you decades before.

After you have gazed and searched the etchings of visitors past, you will walk through a small walkway bordered by sandstone and under a precariously perched boulder. As you make your way through, it is hard not to have a quick second of doubt as to whether you should pass under or not, as I will admit, I had a quick thought of, 'what if today is the day that rock decides to fall'? It is also another great place to take a few more family photos and makes for a great "look at what I'm holding up" props. There are still plenty of Giant City buildings left to awe and amaze you, and you may even find the opportunity to scramble your way upon them to gain an additional view of the Giant City streets on which you have now tread.


Directions (click the Google Map below to enter in your address)

Giant City State Park
235 Giant City Road
Makanda, IL 62958
(618) 457-4836

More Information: 

Local Treks on facebook 
Giant City State Park Stonefort Nature Trail - Be sure to hit this trail too!
Giant City State Park Devil's Standtable - Another GREAT trail in Giant City

Giant City State Park - Official IDNR Homepage
Giant City Trails -  A list of all eight established trails
Giant City Visitor Maps - Maps provided by the IDNR of the entire park
More Photos From Giant City State Park - My Flickr Album for Giant City State Park

Monday, November 10, 2014

Free Photography Class At Kirksville's MDC Office!


Personally, I love taking pictures and feel nearly naked on a hike if I don't have my handy Nikon by my side. I've caught wildlife at play, fragile local wildflowers blooming, and my family's adventures forever through the digital eye of my camera. I value every single snap of my camera's shutter, and I can now look back through those photos and find myself instantly teleported to that moment in time. If you too love photography or are just thinking about taking it up, you may want to read on about a free class the MDC is offering in Kirksville, MO.

If you're lucky enough to live near the Missouri Department of Conservation's Kirksville, MO office you can take advantage of a fantastic free class on nature photography this Saturday, November 15 at 1:00 p.m. The class is open to all ages, but children are required to be accompanied by an adult, and no registration is required. So bring your digital camera and dress for the season, who knows, you may very well find your inner Ansel Adams!

Directions & Address:


Missouri Department of Conservation: Northeast Regional Office
3500 S. Baltimore Street
Kirksville, MO 63501

For additional information or questions on this event, you can call MDC Naturalist Amanda Moore at (660) 785-2420 or visit the Missouri Department of Conservation's event page by clicking here.